About
The MaskBuddy is used to create 3D masks based on World Position, PRef or Normal data, for use in the mask inputs of other nodes. It has a built in preview feature to help you place your masks easier, and natively supports multiple mask shapes, and edge cleanup within one tool
Contents
How To Use
①
Getting Started
Connect the primary input to a render pass or pipe that contains position and/or normal data, then look at the MaskBuddy with your viewer. You will be presented with a black and white preview of the input rgb by default, this is to help you place the masks easier, and does not affect the result
②
AOVs
By default the MaskBuddy might not have an AOV loaded into it, or you may want to change it for a specific task. You can do so with the AOV channel knob
Below are types of Data AOVs MaskBuddy supports
Position World/Object/Camera/Reference
Normal World/Object/Camera/Reference
If you are interested in setting a permanent default AOV, and/or limiting the AOVs available to the node, see the Setup/Installation section below
③
Shape Placement
Hold Ctrl+Alt while sampling the preview image to pick where the center of the 3D mask will be. The mask shape will be displayed as a light blue colour over the preview image
④
Shape Manipulation
Use the transformation knobs in the Shape 1 panel to adjust the overall Radius, Rotation, and Scale of your mask
Different shape types can have slightly different manipulation controls
⑤
Shape Falloff
Use the Falloff knobs to adjust how quickly the mask transitions from on to off, and how it does so mathematically
⑥
Shape Types
Use the Type knob to change what kind of 3D shape is generated
If some of the shapes, like the cone/torus are being generated sideways, see the Setup/Installation section below
⑦
Multiple Shapes
Add more mask shapes with the Plus buttons located in the bottom right corner of each Shape panel and remove them with the Minus button.
MaskBuddy currently supports up to 6 shapes at a time
⑧
Shape Interaction
Use the Operation knobs for each shape to change the way they interact with the shape(s) above, and create more complex masks
⑨
Connect
Connect the MaskBuddy to the mask input on any standard nuke node to isolate the operation to the 3D mask you’ve created
The preview image is restricted to the rgb channels and has no affect on the masks alpha, so you don’t need to disable it before rendering/saving!
Advanced Options
Advanced Falloff
Change the Falloff knob to Advanced to adjust the falloff more precisely, via a curve editor. Select the Master curve and adjust/add Bezier handles to alter the way the falloff occurs for this shape. Using a curve editor like this allows us to make custom profiles, or mix things like linear and smooth together, to have more control over the results
*Advanced falloff is only available for Shape 1 currently*
Precision Fix
Use Precision Fix to remove single and sub pixel errors. These generally appear on the edges of overlapping objects that can’t be resolved properly in the data AOVs
Edge Blur
Use Edge Blur to soften the edge of shapes. You can use the options on the Advanced Tab to adjust the values more precisely
*Be careful where you use this as it can cause other edge issues if used too aggressively. It’s best used for edges that have aliasing issues, and very light grading*
Erode Shapes
Use Erode to grow or shrink the edge of the mask. MaskBuddy uses a custom erode that is capable of true subpixel values, so you can Erode the shapes very precisely
*Be careful where you use this as it can cause other edge issues if used too aggressively. It’s best used only in emergencies, and for objects with very light grading*
Smooth Shapes
Use Smooth to average the AOV data together and reduce fine details
*Be careful where you use this as it can cause other edge issues if used too aggressively. It’s best used only on high frequency objects like hair/grass, and for objects with very light grading*
Preview Options
Use this section to adjust the preview appearance, like the colour, black and white values, and clamp features
Input AOVs
Use this section to set the default AOVs that will show up in the main AOV drop down menu. You can read more about this in the Setup/Installation section below
Calibration
Use this section to calibrate the tool to your render worlds scale and world space coordinates. You can read more about this in the Setup/Installation section below
Tips & Tricks
PRef
Use a Position Reference aka PRef AOV to automatically track MaskBuddy shapes to animations
Normals
Use Normals to generate crude lighting or directional based masks. No shadows or materials with this method however!
Setup / Installation
Install
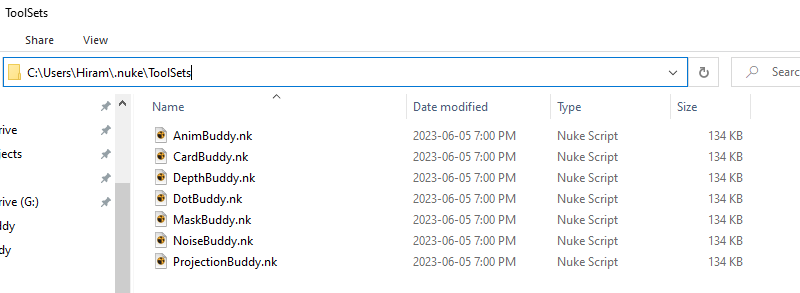
For Personal use. Place the downloaded .nk file into your ToolSets directory. If the ToolSets folder doesn’t exist you can create it. After doing this, and restarting nuke, the Tool will show up when you tab search in nukes node graph for its name
You can read more about this process in the official docs here
For Pipeline use. Always speak with your studios Pipeline support staff before trying to install anything. Every studio is different, but you’ll likely need to ask them to place the file into a central tool repository so everyone can access it
Setup
The Buddy System comes with some calibration functions that can be adjusted before the tool is handed out to your team, or on the fly as needed by the artists. Since all projects are a little different, following these steps should help get the best experience out of the tool
Under Advanced > Input AOVs, use the 4 channel knobs to set the default AOVs the tool can use, this will limit the options in the primary AOV knob to reduce clutter/confusion. After setting this, you can uncheck/check the All box to the right of the AOV, at anytime to allow access to all the input AOVs again
In addition to the above you may want to set the primary AOV knob to use a preferred AOV by default, like world position. You can do this at anytime, and simply save over the file as outlined in the install section above to bake in that AOV in permanently
The example on the right is from the MaskBuddy, but the AOV setup step is the same across all the Buddy tools
Under Advanced > Calibration, use the Global Scale slider to change the default size of all the shapes at once. If the shapes are being generated too large/small, you can use this to make them the right size for your world space, while still keeping the main radius knobs all set to a value of 1 as a default
Under Advanced > Calibration, use the Slider Scale knobs to set the main radius knobs min/max values. If your world space is drastically different than the default 0-100 values, then this can adjust the sliders to work better for you
Under Advanced > Calibration, you can use the Convert “Z Up“ to “Y Up“ check box to reorient the world position data into a Y up world. Some applications use Z as the up Axis, and this will cause certain shape types, like the Cone, Cylinder, Torus to be generated sideways
Development Goals
To-Do
Below are some of the things I still would like to do with the tool, if time permits. If there is something you think would be a nice addition, feel free to reach out!
Add a 3D preview option
Add more dynamic mask shapes
Investigate blink scripts for some of the more complex shapes
Investigate increasing the shape limit or removing it if possible
Add Advanced Falloff options to all shapes
Add an axis input for tracking
Versions History
Below is a list of the version release numbers, and their changes. You can see your current version at the bottom of Info tab of the tool
-
Fixed inverted mask bug
Fixed bug where rounded square falloff was incorrect for shapes 2-6
-
Optimized some expressions
Updated Help button script
Removed unicode from minus button
Removed channel passthrough for parity with render state
Moved Unpremult checkbox to Advanced Input AOVs section
-
Initial release
Contributors
Thanks!
Below are some of the people who helped develop this tool through direct support or indirectly via online resources
Mark Rodziewicz
Sheldon Lisoy
Adam Dent
Chris Fourney
FAQ / Bug Reporter
Frequently Asked Questions
-
The Buddy Systems colour picker uses nukes indirect sampling method to allow the user to sample the data AOV while looking at the rgb of the preview image. Make sure you are pressing and holding CTRL+ALT while sampling the preview image, and not just CTRL/CMD
-
This can sometimes happen the first time you load a large render, and it hasn't been fully cached yet. To fix, look at the render with your viewer and wait for the image to be fully loaded before you try sampling the preview image. After the image is fully loaded the first time, you shouldn't need to wait for the viewer to update again, and can sample at any time
-
The Buddy System tools require rgb and alpha channels to work. If your render doesn’t have an alpha channel the preview image and resulting masks/shapes cannot be generated
-
A few things to try here
Make sure you have loaded the correct type of data AOV into the AOV knob at the top of the tool
Make sure your tools primary input (The input without a name) is connected to a render with an alpha channel
Double check that the result isn’t just really tiny, by adjusting the scale or global scale sliders
If the tool has a Cam input, make sure you have the scene camera connected to it
-
The buddy tools use python scripts to dynamically update their internals based on user input, and this doesn’t work well with the gizmo format. You can try to convert them to a gizmo, and it might work depending on the tool, but it’s highly recommended to keep them as group nodes. If you are looking to TAB create the buddy nodes they can be save as ToolSets https://learn.foundry.com/nuke/content/reference_guide/toolsets_nodes/create.html
Report A Bug
It doesn’t have to be a bug, ideas to improve the tool, or words of affirmation are appreciated too!