
About
DotBuddy is used to create and manage hidden links throughout your comp. Each link features proximity logic that connects them to the nearest matching source. This allows for truly agnostic template design, without having to worry about managing unique link/node names, or UUIDs. Links can also be locked at any time for a more rigid connection, and have many other fun features described in detail below!
Contents
How To Use
①
Creating Sources
Select any nodes, and hit the comma hotkey to create a DotBuddySource. These will act as a connection for any DotBuddyLinks with matching link names
Creating Source nodes will strip the number from the end of a node name to force uniformity, you can change this behaviour in the dotbuddy_config file
If Sources already exist in your file, their link names will be listed in the panel for easy reuse
Sources work best when using the same link name across your templates, for example BTY, EYES, or CAM
②
Creating Links
After creating a DotBuddySource, select nothing in the Node Graph and hit the comma hotkey again. You’ll be presented with a panel that lists all available DotBuddySources, and from here you can easily create DotBuddyLinks from them in the following ways:
Select one or more link names, and hit the Create Links button. This will keep the panel open and create the links
Select one or more link names, and hit the Enter key. This will close the panel and create the links
Use the Search bar at the top to search for a link by name, group or both
Links are sorted by popularity, so the most used ones will be at the top of the list, but you can change the sorting by clicking on any column header
This panel can do a lot of other things that are described in more detail in the Advanced section below!
③
Locked/Unlocked Links
Links have two main states that function as follows:
Unlocked (Purple): The proximity logic runs, and they will connect to the nearest matching source when you deselect them
Locked (Black): No proximity logic, the link will stay connected to the source node regardless of distance/position
You can use the toggle lock hotkey Ctrl+Comma, the Toggle Lock button in the create panel, or the right click options in the create panel, to switch between states
④
Link Proximity & Optimization
This is the core logic of DotBuddy, and allows you to work spatially in the node graph, without having to worry about managing unique link names. For example Instead of naming your links CHAR_A_BTY, CHAR_B_BTY, ENV_BTY, etc... all these can just be called BTY. Then making the correct connections comes down to being near the source nodes you want to link to. Since Nukes node graph is laid out spatially, this works pretty well, and intuitively
The Proximity logic is heavily optimized in the following ways:
Only calculated if the link is unlocked. Locked links always fallback on basic, fast, node name based connections
Only calculated if the position stored in the Link Last Position knob has been found to change more than 100 units in any direction. This allows for micro alignments/adjustments without recalculating (See dotbuddy_config in setup and installation for how to adjust this)
If both the source and link are selected during a move, proximity calculation is skipped, because the distance between them won’t change during move
In the case of multiple DotBuddies being manipulated, all proximity calculations are banked, and run once at deselection
If there is only 1 source in the file with matching link name, skips the proximity logic, and just connects directly
Proximity is determined using faster squared distance math, instead of full square root distance
When using direction modes other than All, any source outside of the chose direction is skipped during proximity check
⑤
Link Direction
By default unlocked links check for matching sources in all directions, but you can use the Direction drop down, direction hotkey Shift+Comma, or Create Links panel Direction Mode to change this behaviour. Changing the direction can be useful if you work with templates really close together, and need the links to only connect to the one on the right, left, etc… If a specific direction is chosen, the link will display an additional eye icon to help identify this change in behaviour
⑥
Broken Links
A link can break if it exists in a file with no matching source, or if the direction is set to look somewhere where no source exists. When they break, they will turn red, get larger text, and display a fire icon, to help you identify them easily. You will also get a warning in the Create DotBuddyLink panel if any are in the file when it opens. A locked link will stay in the error state until it is unlocked again, this is to preserve the locked functionality, and avoid it reconnecting when you are not aware. Unlocking will force a reconnection, if possible
Hotkeys
DotBuddy Create
Hotkey: Comma “,”
This is the main hotkey for creating both DotBuddySources and DotBuddyLinks
If you have 1 or more nodes selected, it will ask you to create new source nodes
If you have no nodes selected it will open the Create DotBuddyLink panel, and let you create links, or view other modes like debug, rename, etc…
Select Links | Open Parent
Hotkey: Alt + Comma “,”
If you have a DotBuddySource selected this will select all the links connected to it
If you have a DotBuddyLink selected this will open the properties of the node connected to the source node (The Parent) as defined by the Parent Index knob on the source. This is useful if you want to alter something in the parent node without having to physically move to it in the node graph, just to open the properties panel, make your change and then move back to where you were before
Toggle Lock
Hotkey: Ctrl + Comma “,”
If you have DotBuddyLinks selected, this toggles the lock state on all of them
Does not change DotBuddySource nodes, they have to be manually unlocked with the Lock Source knob on them, or through the right click context menu in the Create DotBuddyLinks panel
Change Direction
Hotkey: Shift + Comma “,”
If you have unlocked DotBuddyLinks selected, this opens a panel that lets you change the direction of their proximity search
Does not change DotBuddySource nodes, as they have no direction settings
Toggle Live Update On Move
Hotkey: Ctrl+Shift + Comma “,”
This is the original logic of DotBuddy, and has been replaced with the much faster Locked/Unlocked states. It can still be useful for quickly testing the proximity logic in templates, but it will turn itself off as soon as you deselect the node, to prevent any performance issues. Live DotBuddyLinks constantly check proximity while selected, and get a lightning bolt icon to help distinguish them from the other, much more optimized states
Advanced Options
Groups
You can group sources during creation, post creation in the properties panel, or in the Group mode of the Create DotBuddyLink Panel. The idea with DotBuddies is to reuse the same link name for like sources, but grouping can help identify things for specific use cases later
In the Create DotBuddyLinks panel you can use the Mode dropdown to list sources by groups. In this mode you can drag and drop sources in and out of groups, and create links based on groupings. Grouping is optional, and DotBuddy generally works fine without this step, but use as needed. A practical example of using groups might be to group all your common “Mattes” together, or input “Textures," then you can find those easier by searching for the “textures” group in the panel, and/or by using the Groups Mode
Create Links For All Sources
In the Create DotBuddyLink panel, you can right click on any source and use the Create Links For All Sources option to generate a locked link for all matching sources. This is useful when you need to merge z utils for depth cueing, and for other operations that depend on using multiples of the same type of link, like defocus, di mattes, etc…
Link Icons
Links will be created with an icon matching the default node class icon (with some exceptions) This allows you to quickly identify what class of node the link is connected to, and matches the icons in Nukes native tool bar
The custom class icons that come with DotBuddy are:
DeepRead: Same as default icon, but recoloured from green to dark blue, to match deep read nodes for easier identification
DeepWrite: Same as default icon, but recoloured from red to dark blue, to match deep write nodes for easier identification
Write: Same as default icon, but recoloured from red to yellow, to match write nodes for easier identification
WriteGeo: Same as default icon, but recoloured from red to yellow, to match write geo nodes for easier identification
Icons can be disabled, or customized to you preferences in the following ways:
Use the Toggle Icon button or right click context menu in the Create DotBuddyLink panel
Use the Icon checkbox on any DotBuddyLink node
Modify the Custom Icon knob on any DotBuddySource node. This must use a 24×24 .png with transparency, stored in your .nuke directory
Modify the dotbuddy_config file to change things forever. You can read more about this in the setup and installation section below
Parent Index
DotBuddySource nodes come with a Parent Index knob that determines what node connected to its input should be used for the link icon, and which properties to open if you use the Alt+Comma hotkey on a link node. This is useful if you are creating a source for something that has an intermediary node like a crop between it, and the parent node itself. When creating a new source, Dot and NoOp classed nodes are automatically skipped, and the index will set to match the first not null node class it finds attached to input 0
X-Ray & Magnify
In the Create DotBuddyLinks panel, there are two buttons that can help you visualize connections:
X-Ray: Highlights all the invisible connections related to the selected DotBuddies
Magnify: Increases the font size of the selected DotBuddies by the number in the multiplier to the right. Pressing it again removes the Magnification
Both options work via selection in the panel or the node graph
Rename Mode
In the Create DotBuddyLinks panel the Rename Mode lets you do the following things:
Preserve Word: Add a word to find in the existing link names and preserve, for example BTY
Batch Rename: Renames all the selected nodes to only the preserved word. This will turn CHAR_A_BTY, CHAR_B_BTY into just BTY, for example. You can also deselect sources in the panel to prevent them from being renamed
Debug Mode
In the Create DotBuddyLink panel the Debug Mode lets you do the following things
Add/Remove Logic: Adds/removes all the callbacks that create the DotBuddy logic, effectively reverting them to normal NoOps and Dots
Enable/Disable Print: Prints debug data to the script editor. Don’t leave this on by default, it will make things slower. Closing and reopening nuke will disable print as a safety
Broken Links: The debug mode will show broken links if they exist, and gives you right click options to try and fix them
Exporting For Vendor
If you need to share your files with another vendor that doesn’t use DotBuddy, you can technically just hand them the file as is, and all the scripts will skip running due to the included safety features, but if you want a more official/clean handoff, you can do the following things:
Remove the logic with the buttons outlined in the debug section above
Run dotbuddy.remove_all_logic() as part of your packaging scripts, to automatically strip all the logic from the DotBuddy nodes. This can be reversed with dotbuddy.add_all_logic()
Both of these options do the same thing on the back end
Tips & Tricks
Buttons & Knobs
DotBuddySource and DotBuddyLink nodes have some handy knobs, and buttons on them, that do the following things:
DotBuddyLinks
Icon: Toggles the node class icon
Live Update On Move: Toggles the older Live update on move logic
Lock Connection: Toggles lock/unlocked state
Link Name: Stores the link name used in proximity search
Locked To: Stores the node name used when a link is locked
Reconnect: Tries to reconnect the node, if possible
Open Parent: Opens the properties for the parent of the DotBuddySource node, as defined in its parent index knob
Jump to Source: Moves the node graph view to the connected source node
Jump to Link: Moves the node graph view to the connected link nodes, and cycles through them on repeat runs
Link Last Position: Stores the last position of the link node for optimization purposes
Source Last Position: Stores the last position of the connected source node for optimization purposes
DotBuddySources
Lock Source: Toggles lock/unlocked state
Link Name: Stores the link name used in proximity search
Group: Stores a comma separated list of group names
Parent Index: Stores the node connected to the source to use for the class icon and parent
Custom Icon: If empty use the icon defined by the Parent Index, otherwise override with a custom icon. These must be .png files with transparency and 24×24 dimensions
Select Links: Select all the links connect to this source
Jump to Source: Moves the node graph view to the connected source node
Jump to Link: Moves the node graph view to the connected link nodes, and cycles through them on repeat runs
Last Position: Stores the last position of this source node for optimization purposes
Change Dot Size
In the DotBuddy menu you can find a script that changes all Dot sizes while keeping their relative centers. This can make it easier to see/grab DotBuddyLinks, but because of the way nuke handles dot sizes, it will change all the other normal dots as well
Templates
If you use DotBuddy in your templates, you can setup the same template for all your characters, and let the proximity logic handle the connections. This significantly cuts down on redundancy, and saves time. You can also setup custom icons in your templates, and source parent index’s, to help make your artists lives easier
Snippets & ToolSets
If you use DotBuddy in snippets in addition to your templates, you can place a snippet in any template, and it will auto connect. For example if you have a template with eye mattes, using a DotBuddySource called EYES, you can make a snippet using matching DotBuddyLinks, and it will connect to the EYE mattes, for whatever character it is nearest to
Stamps Conversion
If you’re currently using Stamps, you can run the included Convert Stamps to DotBuddy script found in the DotBuddy menu to convert all your stamps to DotBuddies, and try it out! There is also a script in the same location called Convert DotBuddy to Stamps, if you change your mind. It’s recommend to save a backup before conversion, just in case!
Setup / Installation
Install
For BuddySystem
Step #0: See installation instructions for BuddySystem. DotBuddy comes installed with BuddySystem v01.07 or higher
For Standalone Installation
Step #1: Place "DotBuddy" folder in your .nuke directory
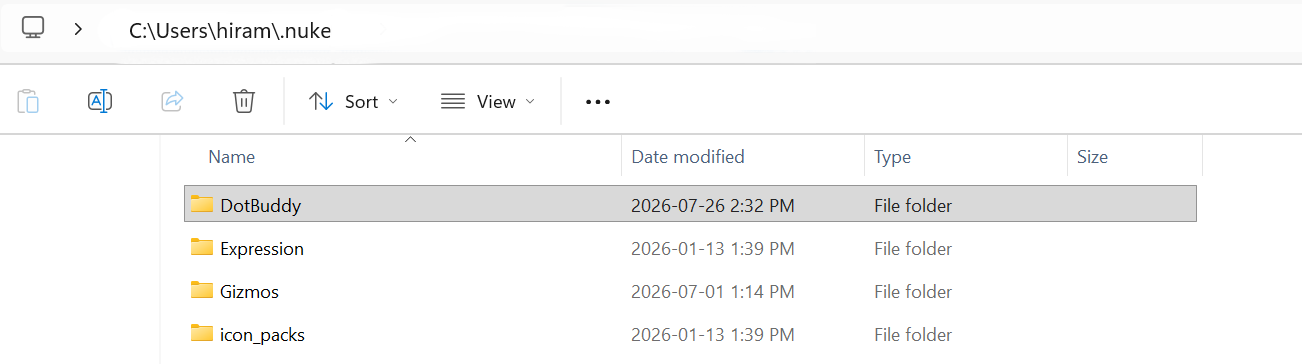
Step #2: Add this python to your menu.py It will be in the same .nuke folder, if it’s not you can make one with any text editor. You can skip the Import line if you already have it
import nuke
nuke.pluginAddPath('./DotBuddy')
Step #3: Launch Nuke. If everything worked, there will be a new DotBuddy menu item on the toolbar
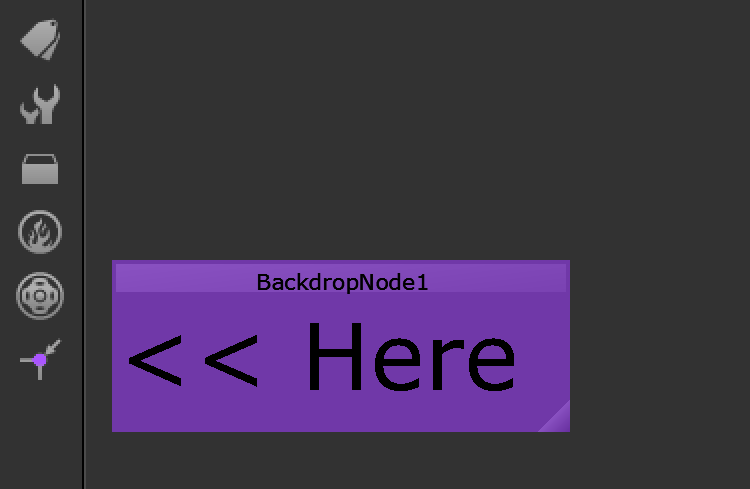
If you install the full BuddySystem later, remember to delete the DotBuddy folder, and remove the python from your menu.py to avoid double installing
For Pipeline use
Always speak with your studios Pipeline support staff before trying to install anything. Every studio is different, but you’ll likely need to ask them to place the file into a central tool repository, so everyone can access it
dotbuddy_config.py
DotBuddy comes with a config file that you can use to customize how it works. The file is called dotbuddy_config.py and can be found next to the main dotbuddy.py file. In the config file, you can change the following things by editing the purple text, saving, and relaunching nuke:
Features
DB_AUTO_BACKDROP_GROUPING = False # Automatically extract link name from the backdrops label that the node is on
DB_STRIP_TRAILING_NUMBERS = True # Strip trailing numbers from node names when creating link name
DB_IGNORED_CLASSES_FOR_NAME = ('Dot','NoOp',) # Node classes to skip when making a source/link name
DB_CREATE_LOCKED_BY_DEFAULT = True # Default state when creating DotBuddy Links
DB_MAGNIFY_MULTIPLIER = 6 # Font size multiplier applied when using the Magnify button
UI Settings
DB_PANEL_DEFAULT_WIDTH = 500 # Default width of the Create DotBuddy Links panel
DB_PANEL_DEFAULT_HEIGHT = 350 # Default height of the Create DotBuddy Links panel
Creation Offsets
DB_CREATE_SOURCE_Y_GAP = 20 # Vertical spacing when creating a source below another node
DB_CREATE_LINK_Y_GAP = 40 # Vertical spacing when creating a link below a source
DB_CREATE_X_STEP = 100 # Horizontal spacing when creating multiple links at once
DB_CREATE_Y_STEP = 60 # Vertical spacing when creating multiple links at once
DB_NOOP_DEFAULT_WIDTH = 80 # Nukes default NoOp width (Since source class is known, it's faster to hardcode this, than get width/height everytime)
DB_NOOP_DEFAULT_HEIGHT = 35 # Average Source NoOp height with/without group labels
Optimizations
DB_MIN_UPDATE_DISTANCE = 100 # Safe area that an unlocked DotBuddyLink node must be moved out of before heavy proximity math runs. This allows for quick micro adjustments and alignments
Source Node Appearance
DB_SOURCE_UNLOCKED_COLOUR = 2857762815 # Light Purple
DB_SOURCE_LOCKED_COLOUR = 255 # Black
DB_SOURCE_FONT_SIZE = 17
DB_SOURCE_FONT_COLOUR = 0
DB_SOURCE_LABEL_HTML_SIZE = 2 # The autolabel font size for the link name
DB_SOURCE_GROUP_HTML_SIZE = 1 # The autolabel font size for the (GROUP) text
Link Node Appearance (Valid)
DB_SHOW_ICONS_BY_DEFAULT = True # Whether to show node class icons on newly created links
DB_LINK_ICON_SIZE = 24 # Width/height for the class icons
DB_STATE_ICON_SIZE = 24 # Width/height for the live/locked/direction icons
DB_LIVE_UPDATE_LIMIT = 10 # Hard limit for how many nodes can be live updated/moved simultaneously
DB_LINK_VALID_COLOUR = 2857762815 # Light Purple
DB_LINK_LOCKED_COLOUR = 255 # Black
DB_LINK_VALID_FONT_SIZE = 17
DB_LINK_VALID_FONT_COLOUR = 4294967295 # White
Link Node Appearance (Broken / Errored)
DB_LINK_BROKEN_COLOUR = 3422552319 # Red
DB_LINK_BROKEN_FONT_SIZE = 40
DB_LINK_BROKEN_FONT_COLOUR = 3422552319 # Red
Link Node Appearance (Unlinked)
DB_LINK_UNLINKED_COLOUR = 2139062271 # Grey
DB_LINK_UNLINKED_FONT_COLOUR = 2139062271 # Grey
Read Node Name Filtering
DB_READ_PATH_FILTERS = [
(r'^\{[a-zA-Z0-9_]+:(.*)\}$', r'\1'), # Gets inner path from custom string formats
(r'\?.*$', ''), # Strips parameters like v=10
]
DB_READ_NAME_FILTERS = [
(r'[\._]+(%[0-9]*d|#+)$', ''), # Strips common frame padding like .#### or .%04d
]
Icon Map
This dictionary will merge with the default ICON_MAP in dotbuddy.py. You only need to define new, custom or override existing icons here, the default node icons are defined in the main DotBuddy script. Custom icons must be .png images with transparency, and should be 24x24 pixels. Place them in the Icons folder that comes with DotBuddy, or anywhere else in your plugin paths. The icons that DotBuddy uses are the same ones Nuke comes with, with the exception of the ones listed under 'DotBuddy Icons' in the main script
# Custom Read class and custom icon example
'ReadBuddy': 'ReadBuddy',
# Custom Read class and default icon example
'ReadBuddy': 'Read',
# Any node class and no icon example
'Read': '',
Holy smokes, you made it to the bottom! Well done! If you run into any issues or have any questions, feel free to reach out!
Development Goals
To-Do
Below are some of the things I still would like to do with the tool, if time permits. If there is something you think would be a nice addition, feel free to reach out!
New features
Update icons to keep up with latest nuke releases
Versions History
Below is a list of the version release numbers, and their changes. You can see your current version at the bottom of Info tab of the tool
-
Added node label fallbacks for source nodes if autolabel isn’t present
Fixed bug where AudioReads and ReadGeos would fallback to BTY link names
Added right click option in Create DotbuddyLinks panel to create locked links for all matching sources
-
Initial public release
Added new proximity logic, and a bunch of other things
-
No public release
The original versions that might be kicking around still
Contributors
Thanks!
Below are some of the people who helped develop this tool through direct support or indirectly via online resources
Mark Rodziewicz
Sheldon Lisoy
Adam Dent
Chris Fourney
Egbert Reichel
Tyler Mullett
FAQ / Bug Reporter
Frequently Asked Questions
-
DotBuddy is similar in concept to Stamps. Both systems create and manage hidden inputs in nuke. The big difference is that stamps is based on node names (UUIDs) for connections, and DotBuddy is based on proximity. DotBuddy can work similar to Stamps, if you leave them in their locked state and use unique names for everything, but this doesn’t take full advantage of their features. For example with Stamps each Anchor needs to have a unique name, so you end up with a lot of CHAR_A_BTY, CHAR_B_BTY, ENV_BTY, etc... but with DotBuddy all these can just be called BTY, and making the correct links just comes down to being near the source nodes. Since Nukes node graph uses a spatial layout, this works very naturally in my opinion, and also allows you to copy DotBuddy based snippets from one character to another, and have them all auto connect to the new sources based on the proximity to them
-
I've spent a long time optimizing this. It uses a lot of tricks under the hood to make the logic fast, like the node classes for the links/sources, using squared distance math, deferred updates, and more. The logic that runs the DotBuddies is also tied to their state, so you can always lock them to remove the heavier proximity search, and if you really need to you can remove all the logic and add it back at anytime with the debug options
-
No, they have to remain as dots for the optimizations to work. If they are NoOps like the sources, the proximity search gets flooded with both links, and source nodes, and becomes noticeably slower in my testing. By having only the Source nodes be NoOps, it greatly reduces the amount of nodes the script has to check during the proximity lookup. Dots and NoOps are also the only null nodes in nuke that contribute basically nothing to the overhead, and can connect to anything, so this configuration is the most efficient and streamlined. If you find the Dots small and hard to select compared to NoOps you can try the included Change Dot Size script to make them easier to select
Report A Bug
It doesn’t have to be a bug, ideas to improve the tool, or words of affirmation are appreciated too!